
Disclaimer
Before you start reading please note that I have not been paid or in any other way have I been endorsed for this review. I have requested a trial version of the software and hardware has been purchased by me out of my pocket.
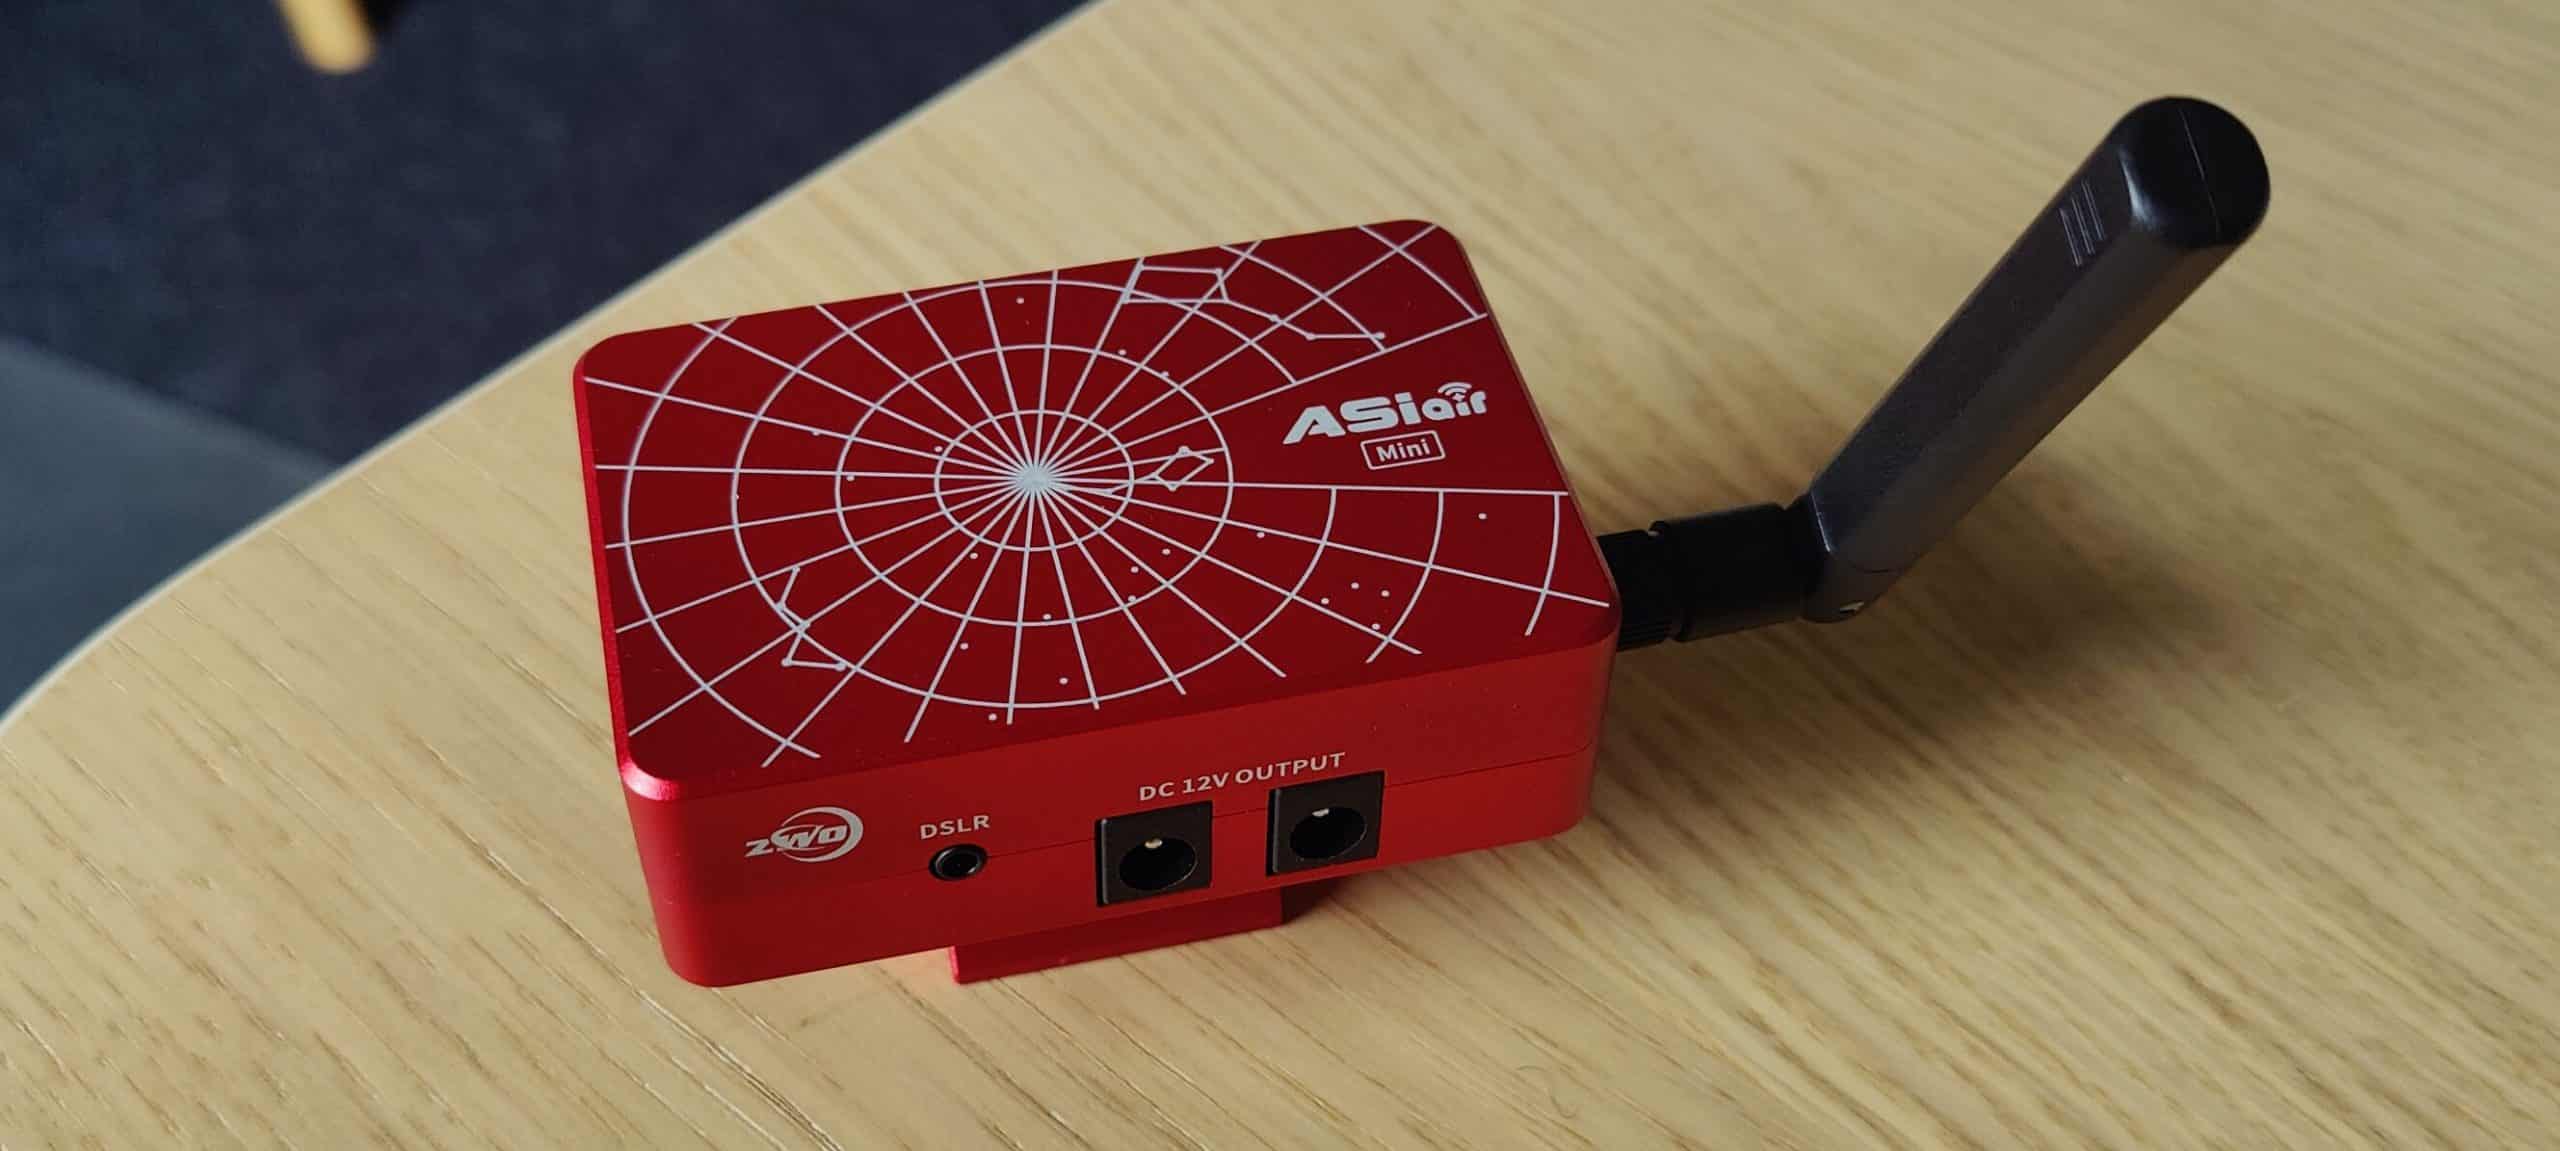
In the past month, the weather in Gjern has improved compared to the weather in January and February. So I have been able to collect some data getting to know my update to the rig. Since the start of 2024 I have updated with the Skywatcher – Star Adventurer GTi tracker and an ASIair mini astro-computer, a guide scope the ZWO 30F4 and then I waited about a month to get the guide camera the ZWO ASI120mm mini guide-camera.
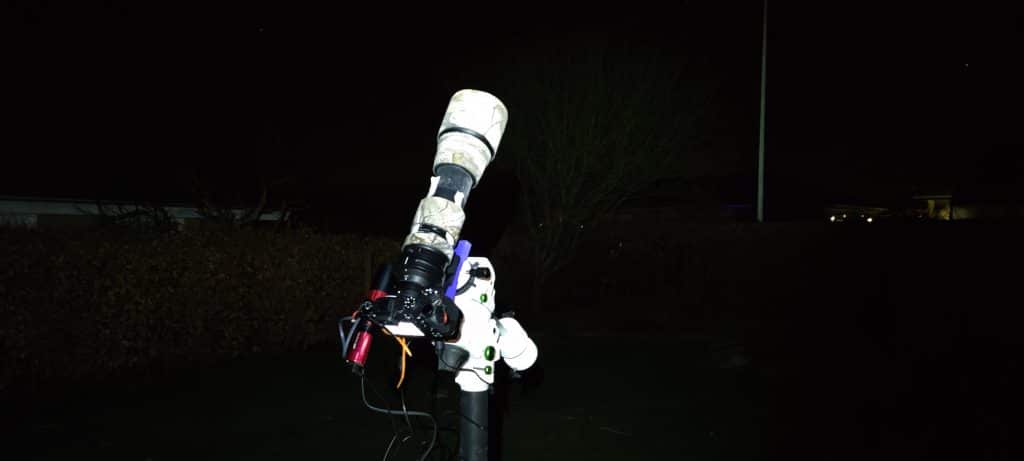
In the image below you can see the rig set up in my backyard. The Tamron 150 – 600 mm lens has been extended to 600 mm and is held in place with some sticky tape the guide scope and camera are attached to the L-bracket of my Nikon Z5 with some zip-ties, this seems to work well, but it could probably be improved.
I have been looking into what software people use to process their astro-images and here PixInsight was one of the ones I could not neglect. So I requested a Trail license for Pixinsigt to see what it was capable of doing. With the computer I have the software is running very fast and smooth. It handles the full process from the raw image to the final image. Before we jump into Pixinsight let’s have a look at what I have observed and processed in the past period.
Improvements after getting the ASIair
After a period where I had been taking a few photos using the shutter button on the camera, I decided to get the ASIair mini as mentioned in a previous post. This resolved in the weather getting horrible for approximately two months. But with the ASIair mini all of a sudden the rig was truly remotely controlled. I now could achieve better polar alignment (PA) and get more accurate pointing to objects. and the interface of the ASIair is working so smoothly that it is a joy to operate the photo rig. The biggest issue with this new equipment was the amount of cables that I now have to plugin every time, and that I have to make sure that they do not get stuck during rotation of the camera.
Besides the PA the ASIair software allows for making observing plans that can run across multiple nights. This is an advantage as my clear skies have been only a couple of hours each night – hence getting the alignment right each time would have been a hassle. In the image below there is an image of the graphical user interface of the ASIair. Here I am working on the project of gathering data for the great Orion nebula – M42. In the plan mode used here, I planned to capture 40 frames of 60 seconds at ISO 800.
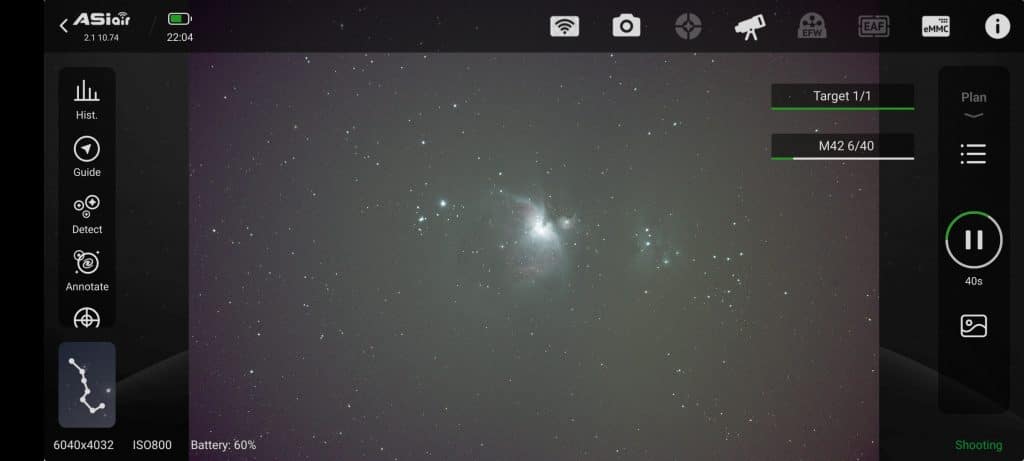
In the image above you can see that I only had my camera and my mount connected to the ASIair – you see this by the highlighted icons at the top of the image the camera has turned white and the scope icon identifies the mount connected. Here the Skywatcher Star Adventurer GTi tracker is connected as EQmod mount. The impact of adding the ASIair has been enormous and has improved the quality of my data significantly as seen below.


M42 – The great Orion nebula
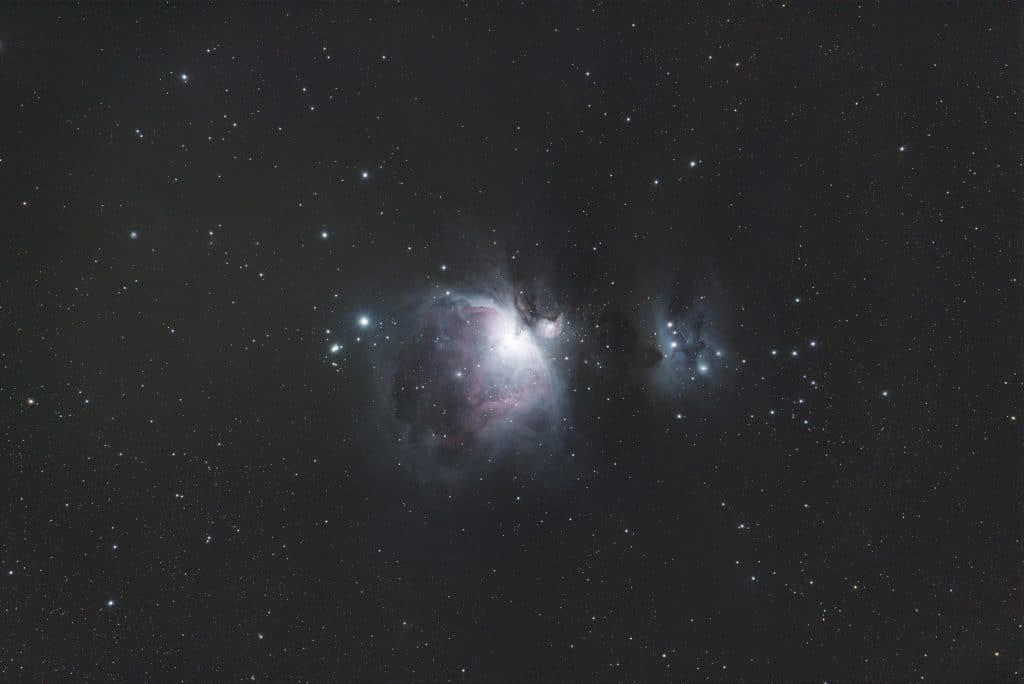
I was able to get 52 good exposures of M42 exposed 60 seconds each. The Nikon z5 camera was set at an ISO of 800, to reduce the noise in the image. I used PixInsight for stacking and calibration of the image which resulted in the image below – I am quite satisfied with the outcome of the image. The image seems to be somewhat low on saturation and vibrance but I quite like the colours – to see a different version with a bit more colour go to the portfolio project on The Great Orion Nebula.
This was the first project where I used PixInsight and I had great help from the YouTube videos of Peter Zalinka – he made a series of videos that specifically targeted new users of Pixinsight. The series I called PixInsight for Dummies (Like Me). I have watched it with great care, and Peter Zalinka is going through the important parts of using PixInsight from the very start to the very end at a pace that even newcomers like myself can follow.
The next project I started working on was M31 – the Andromeda galaxy. Read about capturing M31 below.
M31 – The Andromeda galaxy
Having taken the photo of M42 in the constellation of Orion I wanted to image a galaxy, but where to start? I decided to go for the Andromeda galaxy. For my shot of Andromeda, I did not manage to get as many images to stack as I did for M42. This is the reason that the image does look a bit soft. I only have around 30 exposures of 60 seconds so roughly half the light that I had for M42. Here in Gjern, Denmark where I live the M31 is circumpolar meaning that it never sets below the horizon. For that reason, it was an obvious choice to photograph.
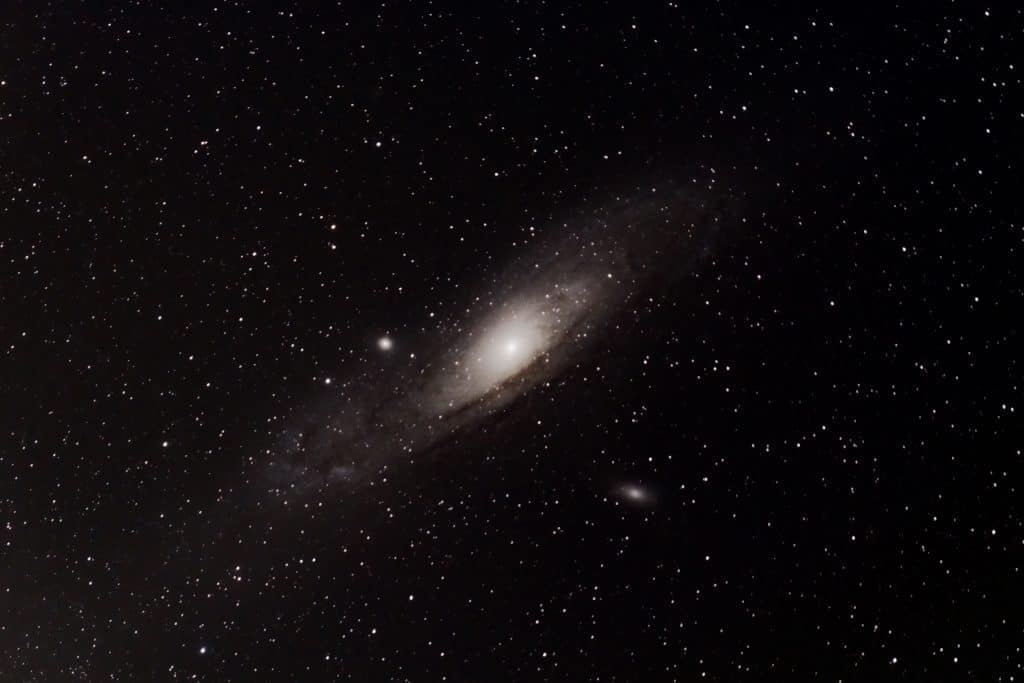
again the images were stacked and processed in PixInsight. Having worked with PixInsight on the Orion project the steps in the process started to make sense. Even 30 minutes worth of data produces a fair result with this setup, even without auto-guiding. However, the limiting factor here is the integration time. More light frames will produce a more crisp image with more definition in the dust of the galaxy. Thereby giving M31 the true value that it deserves.
The impact of auto-guiding
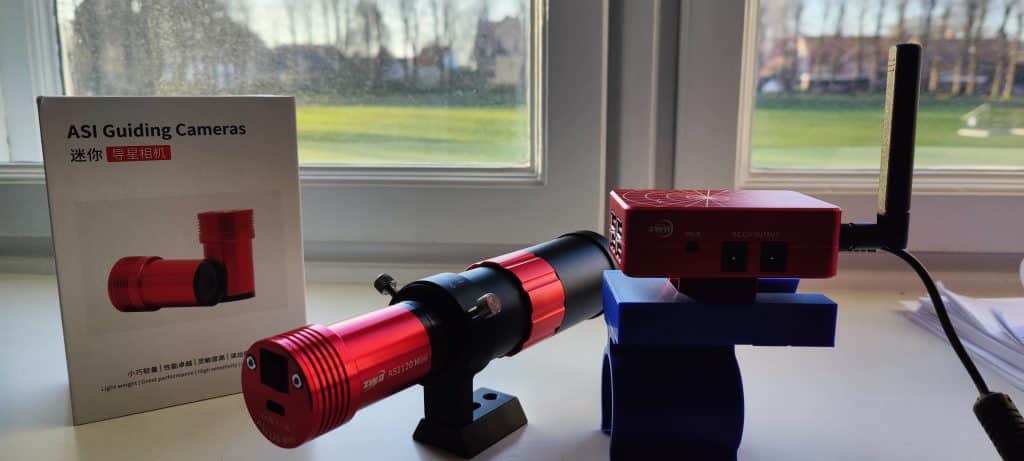
The next update of my rig was when my guide cam arrived. I did not think it would make a lot of difference but the dithering of the images has made a difference in the observations. In the image below you can see the guide camera and guide scope assembled and roughly focused, beside you can see the ASIair mini and a 3D-printed mount clamp that fits the tripod leg.
with auto-guiding, I was all of a sudden able to dither which is important when you use a regular color camera to record your images. The problem is the bayer matrix that provides you with the color of the image. This matrix holds the colours over certain pixels, and if you do not move your deep sky object around you will only see parts of the object in green, parts in red and the final bit in blue. Thereby reducing the amount of information present in the image. The dither should not be too much as you do not want to have to trim too much of the image after stacking either. I have chosen to dither by 10 pixels with my guide setup this increases the overhead time between images but provides better results. My first target with this addition to my setup was the Pleiades also known as M45.
M45 – The Pleiades
I have always been fascinated by the Pleiades, they are so easy to spot in the night sky during the winter months when the sky is dark here in Denmark I often feel that I can see some of the beautiful reflection nebula with the naked eye. This time around I managed to get even less data only a total of 20 images to stack, but since the object was very bright and there was no moon present it was 20 high-quality frames. After stacking them in PixInsight I ran the sequence of edits suggested by the Zelinka video linked earlier. I was able to get a pretty decent result. as you can see below.

Finally, I want to finish this post by showing the latest image I have taken it is the Galaxy M81 known as Bode’s galaxy.
M81 – Bode’s galaxy
The image of Bode’s galaxy makes me at the same time proud since it is one of the best results I have achieved yet along the image of M42 and at the same time a bit worried since my stars seem to be very soft and not sharp and crispy. But looking at the galaxy it is evident that I was in focus when I recorded the data but my lens might be slightly off, and this is suggesting that I might be looking to find a new refractor to mount my trusty old Nikon Z5 to.
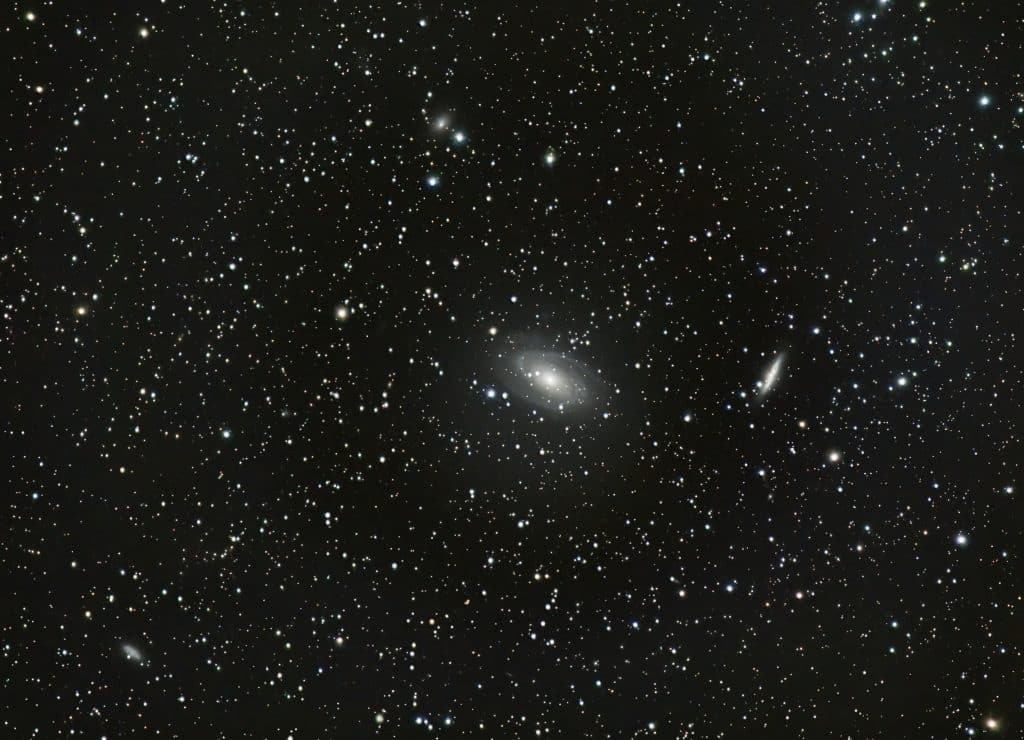
But what refractor should I go for? which can accommodate a full-frame sensor and what about backfocus for a mirrorless camera? There are a lot of questions that have come to my mind. Most of all the scope that I might choose to go for has to be lightweight since I have to sit on top of a Star Adventurer GTi which has a load capacity of 5 kg. I must say that I like the focal length of around 600 mm very much but scopes with that focal length are too heavy for my mount. Back to the image of M81.
The image of M81 is a stack of 52 exposures of 60 seconds. With auto-guiding, I could have opted for 120-second exposures but It was a bit windy so no need to force the issue here. Again the image has been stacked and processed in PixInsight and I must say that I am quite satisfied with the result.
Concluding remarks
In conclusion, I must say that I have never thought that I would need a peace of software like I needed PixInsight. It makes the entire process from start to finish so satisfying. The quality of my images has dramatically improved, and the only thing lacking now is more integration time on the targets. I look forward to playing more with the gear and with PixInsight unfortunately my trial version runs out in 14 days or so and by then I will have to invest in the software.